Discover the secrets of iPhone photography and elevate your shots to new heights with our quick mobile photography tips guide.
iPhone photography has revolutionised the way we capture and share memories. With the convenience and quality of smartphones, everyone can be a photographer. But, how can you stand out in a sea of daily uploads and create images that resonate? Dive into our ultimate guide to iPhone photography.
1. Understand Your iPhones Camera:
Every smartphone is equipped with unique features. Understand your camera settings and where they are to harness its full potential. Familiarise yourself with features like focus lock, exposure settings & portrait mode.
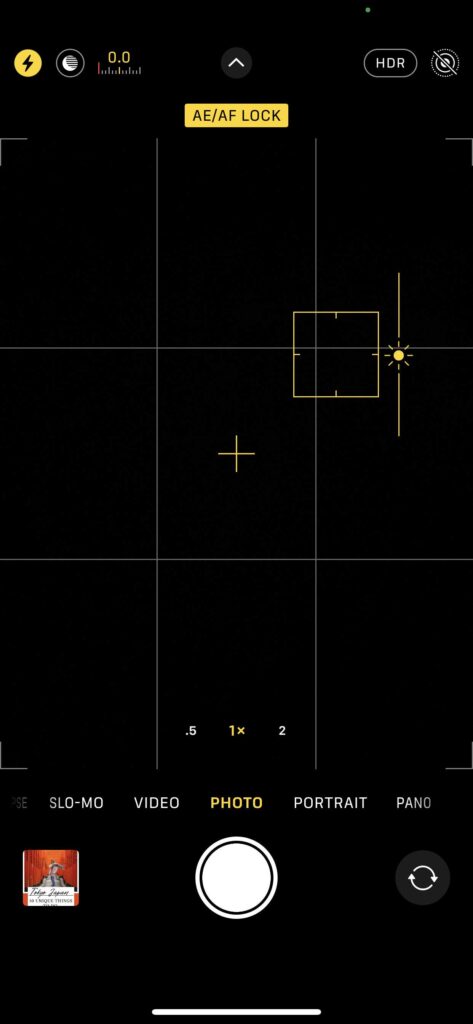
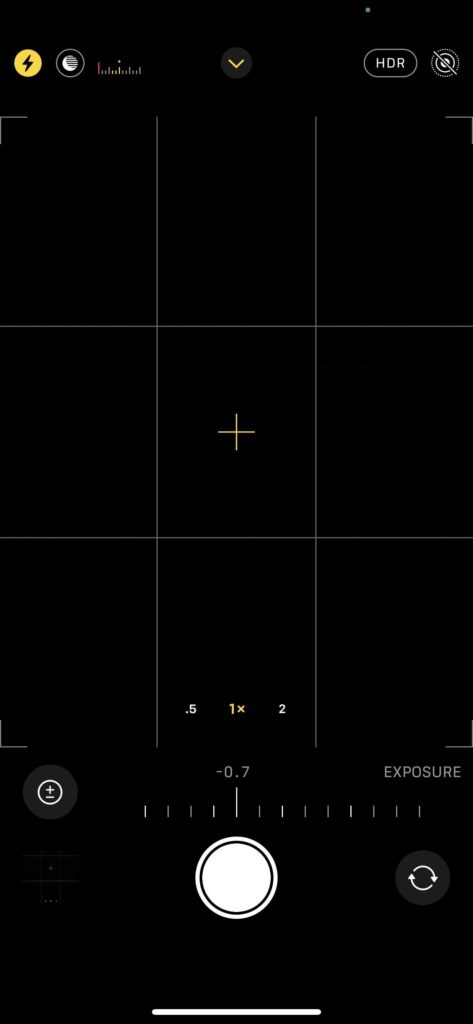
- Exposure lock: tap and hold on the screen to adjust and lock exposure of area in your frame with the yellow box. Drag the sun icon up or down to adjust the exposure. Note: this also locks the focus on the area selected. Tip: Underexposing your iPhone photos slightly can help make them look cleaner and have a more balanced exposure.
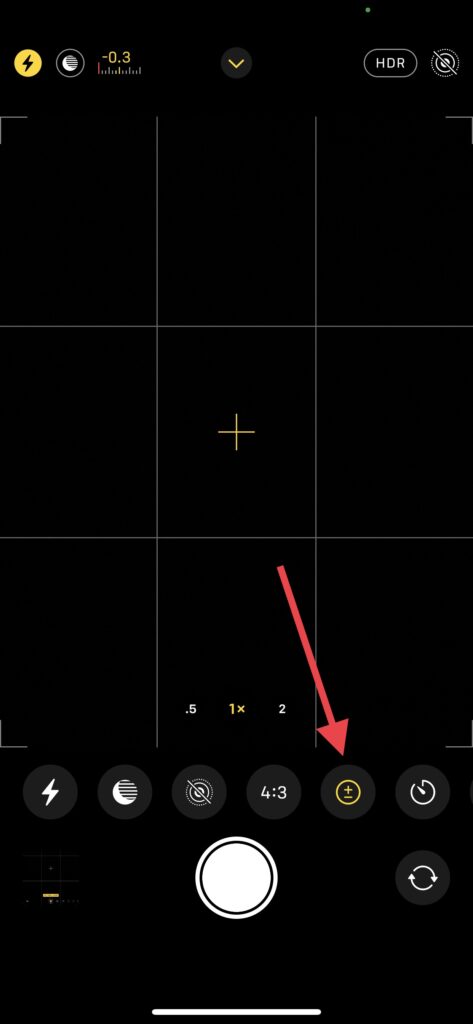
- Exposure slider: swipe up on the camera screen and select the +/- button to access the exposure slider. You can use it to adjust the brightness of you shot without affecting the focus.
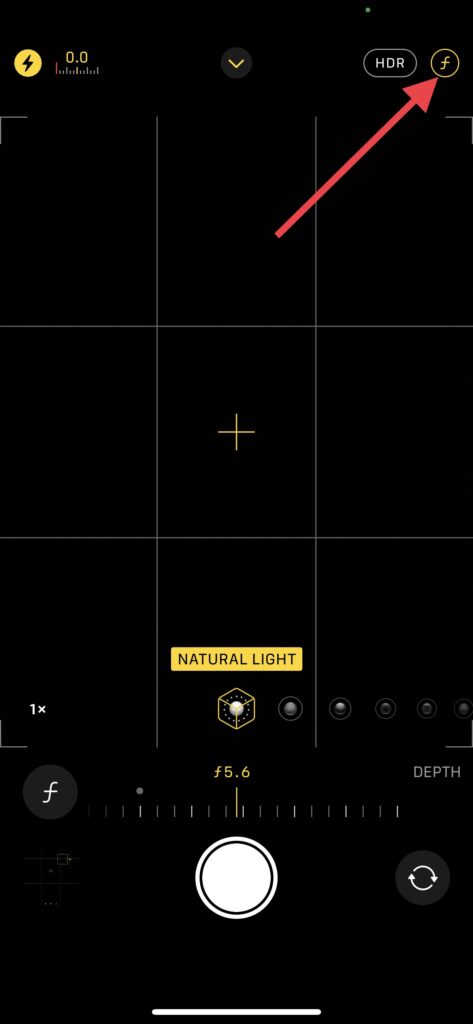
- Portrait Mode: use portrait mode for a shallow soft focus look similar to a profession DSLR camera. Tip: Tap the f button on the top right to select the aperture, the smaller the number the more soft focus effect you will get. Going too low with the f number can look a bit fake, we suggest around f5.6 to f8.
- HDR Mode: experiment shooting with HDR mode on and off to see what you like best. Turn it on and off by tapping HDR in the top right of the camera screen. HDR is good for high contrast scenes like sunsets or bright midday sun and helps balance out the exposure.
2. Composition (Rule of Thirds):
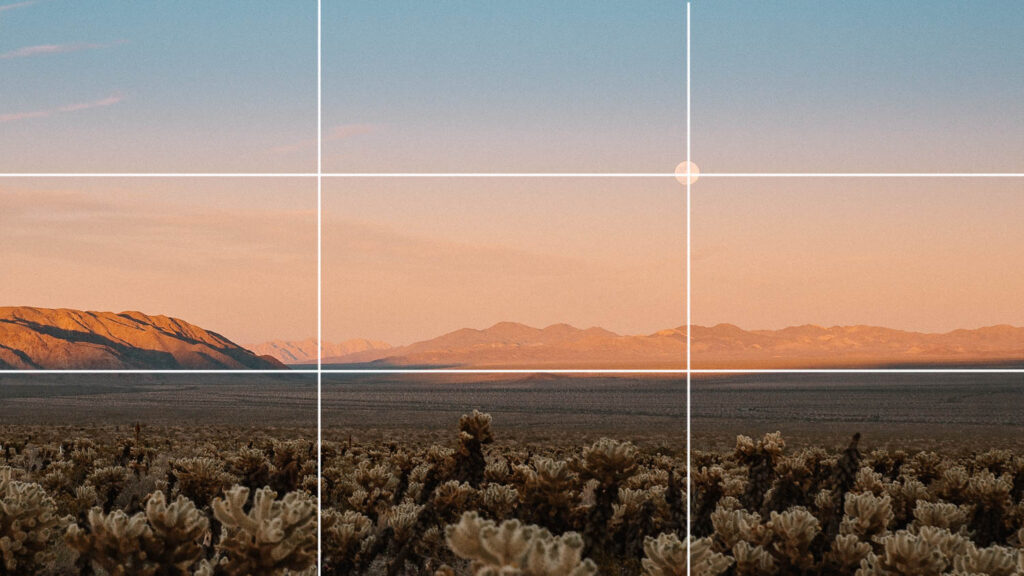
The right composition in a photo can really help a shot look great. One of the easiest composition techniques is the classic rule of thirds. This is were you have grid lines that divide your image into 3 vertical and 3 horizontal sections. Placing key element of you image on these lines or where they intersect helps to creat a more pleasing balanced composition.
Rule of thirds grid: On iPhone turn on the rule of thirds grid by going to: Settings, Camera, Composition and turn on “Grid“. Place the subject of your photo at the intersections of the grid lines for a balanced and visually pleasing result. Try placing your horizon on one of the horizontal lines for a more balanced image.
3. Lighting is Key:
Natural light works wonders for iPhone photography. Avoid harsh contrasty shadows and use soft golden hour for that cinematic warm, glowy look. If in bright sun, try backlighting your subject by placing the sun behind them for a softer even light. If shooting indoors, position your subject near a window.
4. Get Creative with Angles:
Don’t just shoot from standard eye level. Try different angles: shoot from below, above, or use foreground elements to create intriguing compositions. Photos that have a new or unique perspective help to catch peoples attention.

5. Post-Processing Magic:
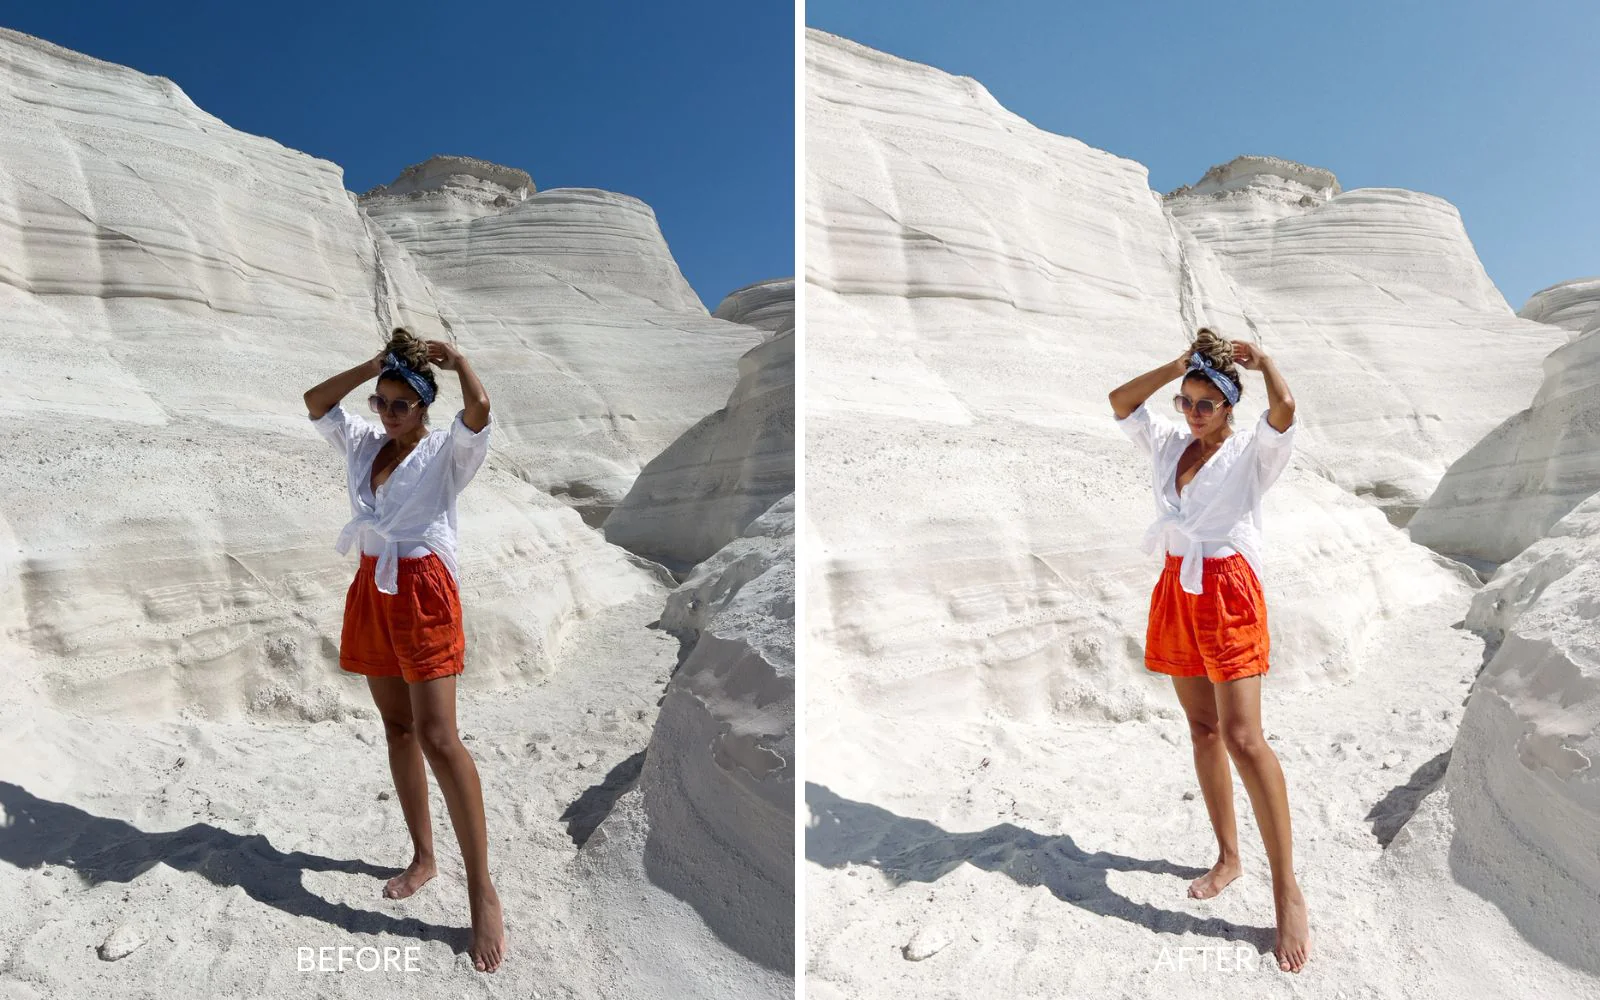
The magic is often in the editing. Use an app like Adobe Lightroom Mobile to edit your images. It’s packed with professional editing tools to transform your photos. Adjust exposures, warmth and even remove unwanted objects. Try editing with Lightroom presets, presets help give you a jump start in your editing and give your photos a unique look. Check out our collection of Lightroom presets that offer a range of looks, from warm vintage film tones to vibrant bright vibes, perfect for all your mobile shots.
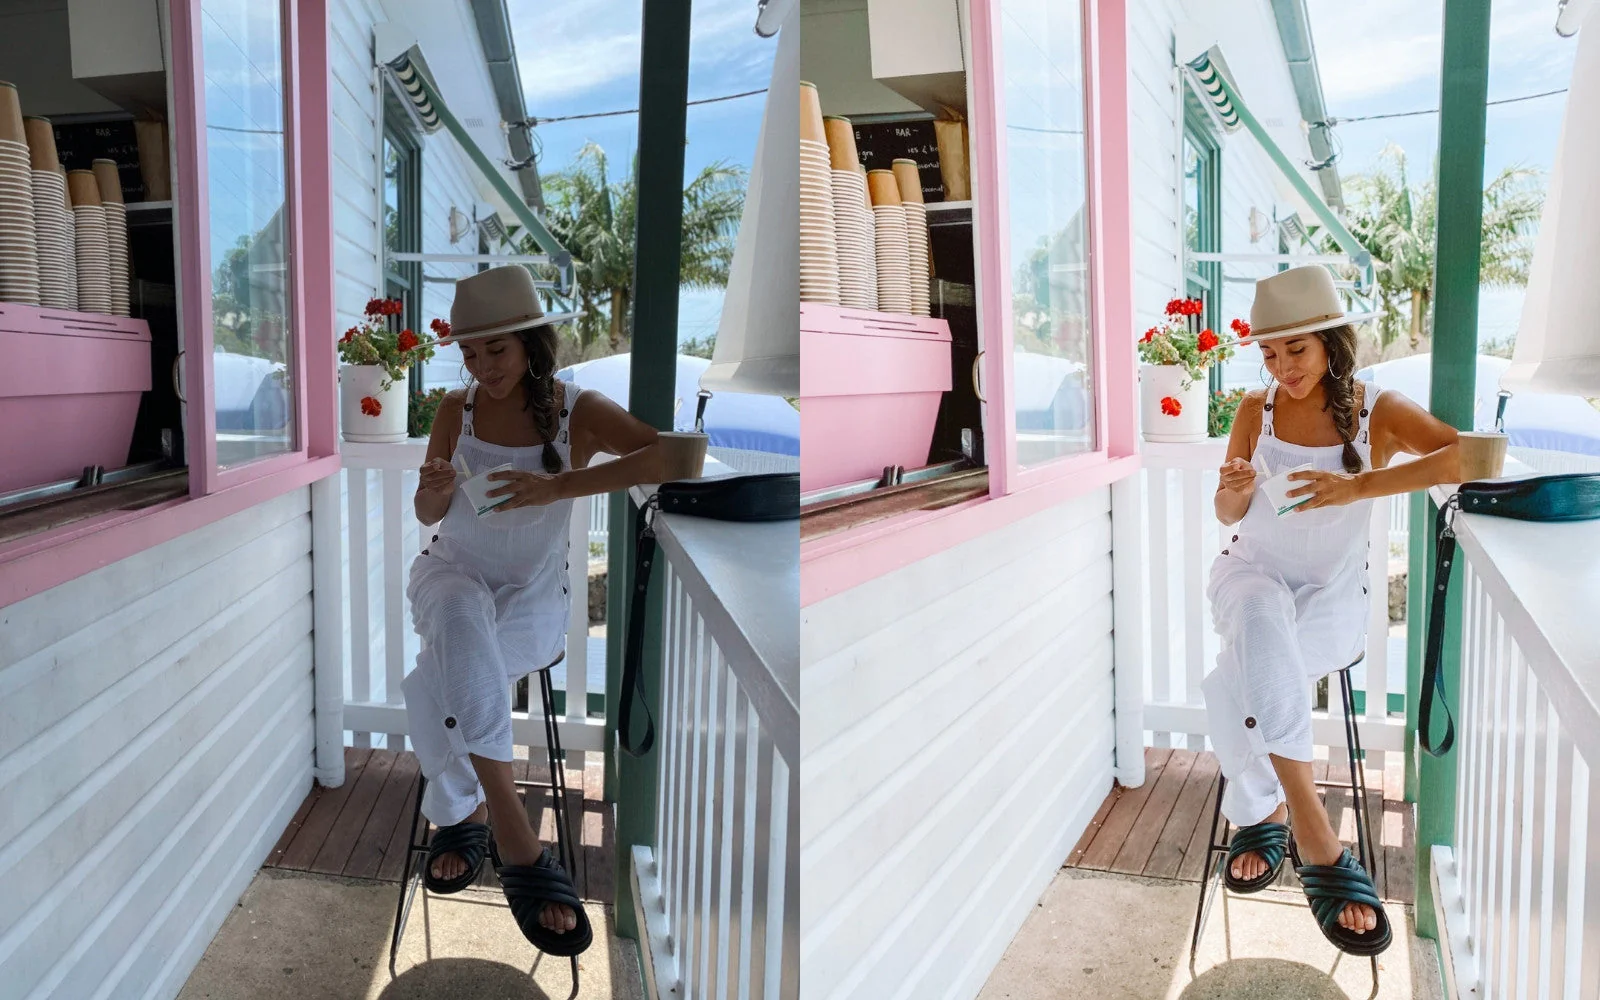
Shop our best selling iPhone photo presets here
6. Don’t Overdo It:
While editing is crucial, over editing can make your image look unnatural. Use editing adjustments sparingly and always aim to retain the original essence of the photo. Avoid lifting the shadows too much or lowering the highlights to far, go easy on the Lightroom sliders.
7. Invest in iPhone Photography Gear:
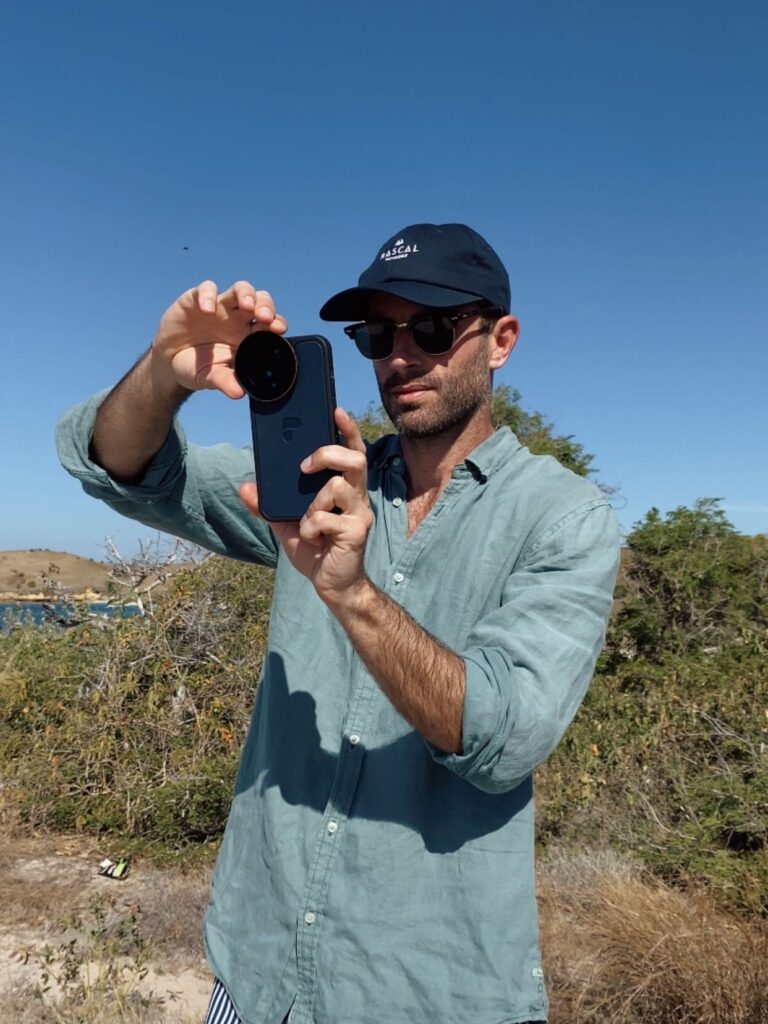
Consider add ons like clip on filters, lenses, or tripods to enhance your photography experience. We love to use a CPL (circular polarizing filter) for ocean or landscape shots, it helps to remove sun glare off water to make it clear and vibrant. A tripod with a phone mount is great for night or couple shots. We use a jobby grip tight pro that includes a blue tooth remote to trigger the shutter so no more running with that 10 second timer :). Feel free to check out some of the iPhone photography gear we use on our Amazon affiliate store front here


8. Continuous Learning:
Photography is a journey. Watch tutorials, ask question, experiment and continually seek inspiration. Instagram, Youtube & TikTok are amazing resources for photography tips. We share more resources and tips on our creator tips blog here along with our Instagram page dedicated to creator tips here.
9. Share Your iPhone Photography Work:
Engage with the community. Dont wait till you photography is “perfect”. Start sharing your work on Instagram, TikTok and seek and share feedback. Remember, theres no right or wrong way with photography, experiment and develop your unique style to stand out from the crowd.
10. Practice, Practice, Practice:
Like any skill, the more you practice, the better you’ll get. So, keep clicking!
Mobile photography is not just about capturing a moment, but expressing a vision. With these tips and your own unique creative vision, you’re well on your way to mobile photography mastery.
Ready to elevate your mobile photography game?
Check out our collection of best selling Lightroom Photo Presets tailored for iPhone Photography here.
Click To Shop Our iPhone Filters Here

